This section describes how to set up R2P2 and provides general information for R2P2 newbies.
IMPORTANT: Laptop Security Settings
If your laptop is configured to prohibit writing to USB memory devices, likely due to your company’s security policy, it will not function😣
Mac Issues
- From our experience, Mac laptops occasionally encounter issues during the workshop
- We are unsure of the specific models that may have problems. Both Intel Macs and M1/M2/M3 Macs have had issues in the past
- Please be aware that we will not be able to know if your Mac will work until the day of the workshop
Install R2P2 into Raspi Pico
-
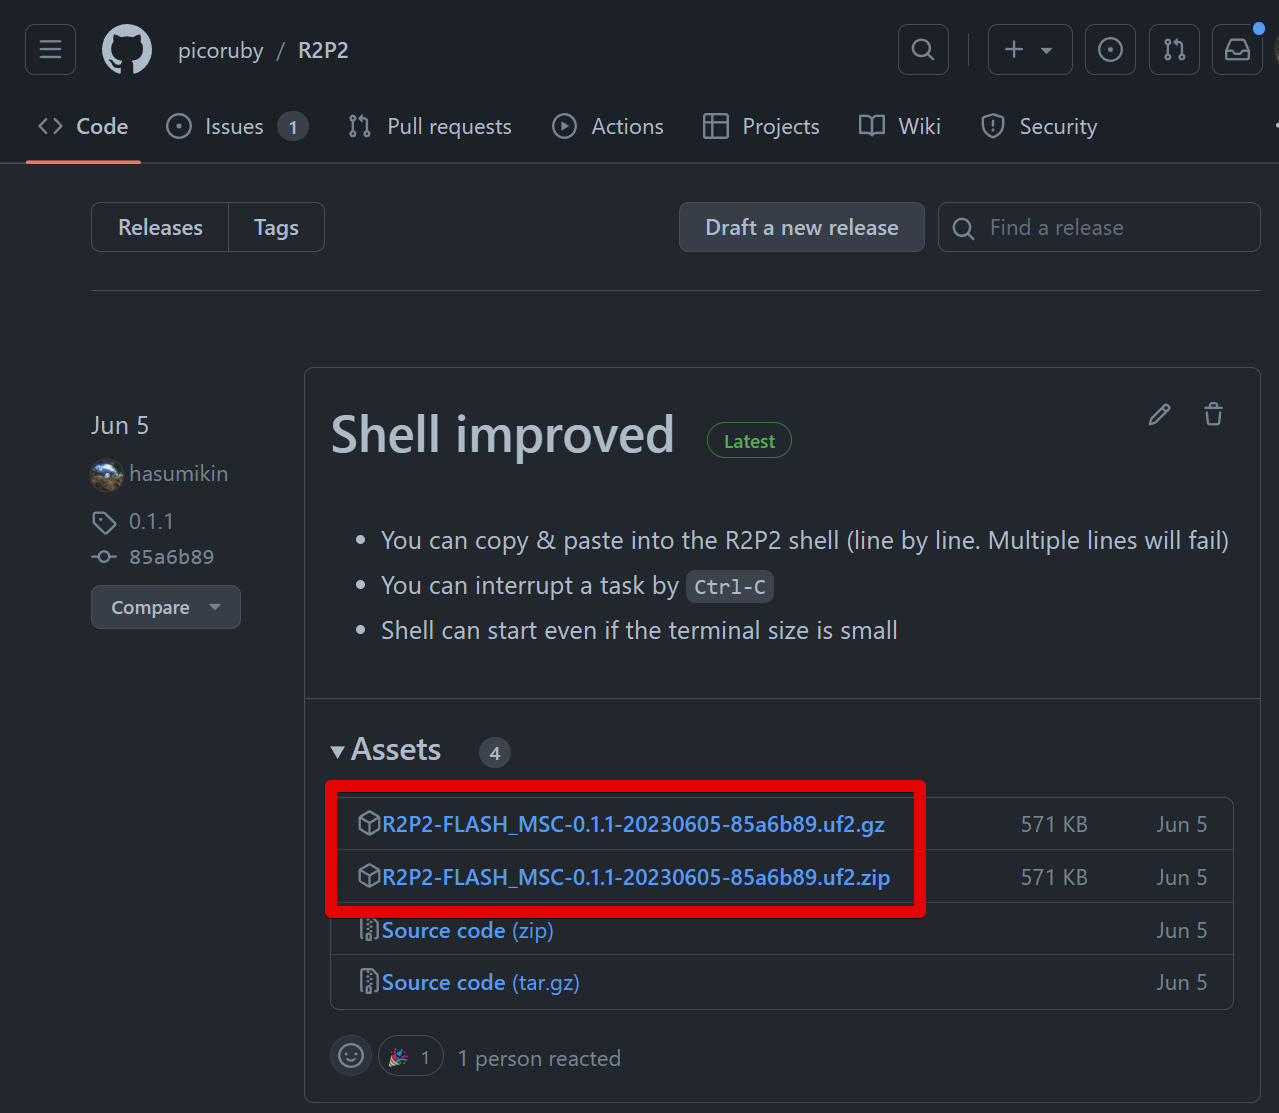
Download the latest R2P2-PICORUBY-*.uf2 from GitHub https://github.com/picoruby/R2P2/releases (Of course, unzip it)
-
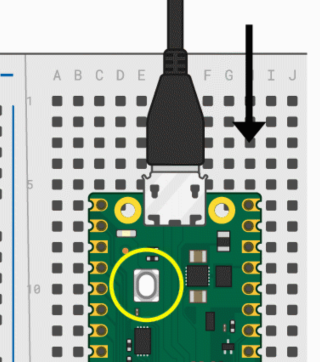
Connect Pi Pico and PC while\npressing the BOOTSEL button. Then you’ll find RPI-RP2 (for Raspi Pico) or RP2350 (for Pico2) drive in file manager (File Explorer or Finder)
-
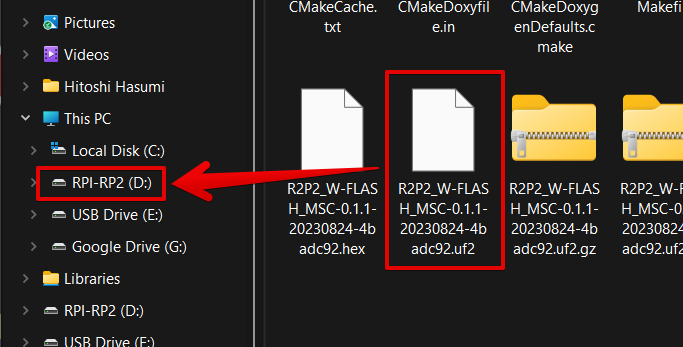
Drag & drop R2P2-*.uf2 into RPI-RP2 drive
-
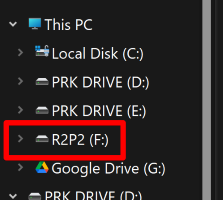
You’ll find “R2P2” drive (sometimes naming the drive fails and it shows “USB Drive” or something like that. But it would be working anyway)
-
Open a proper serial port on the terminal emulator. Information about terminal emulators can be found in /terminal-emulator

-
If you could see a screen like this, congrats, now you are at the gate🎉
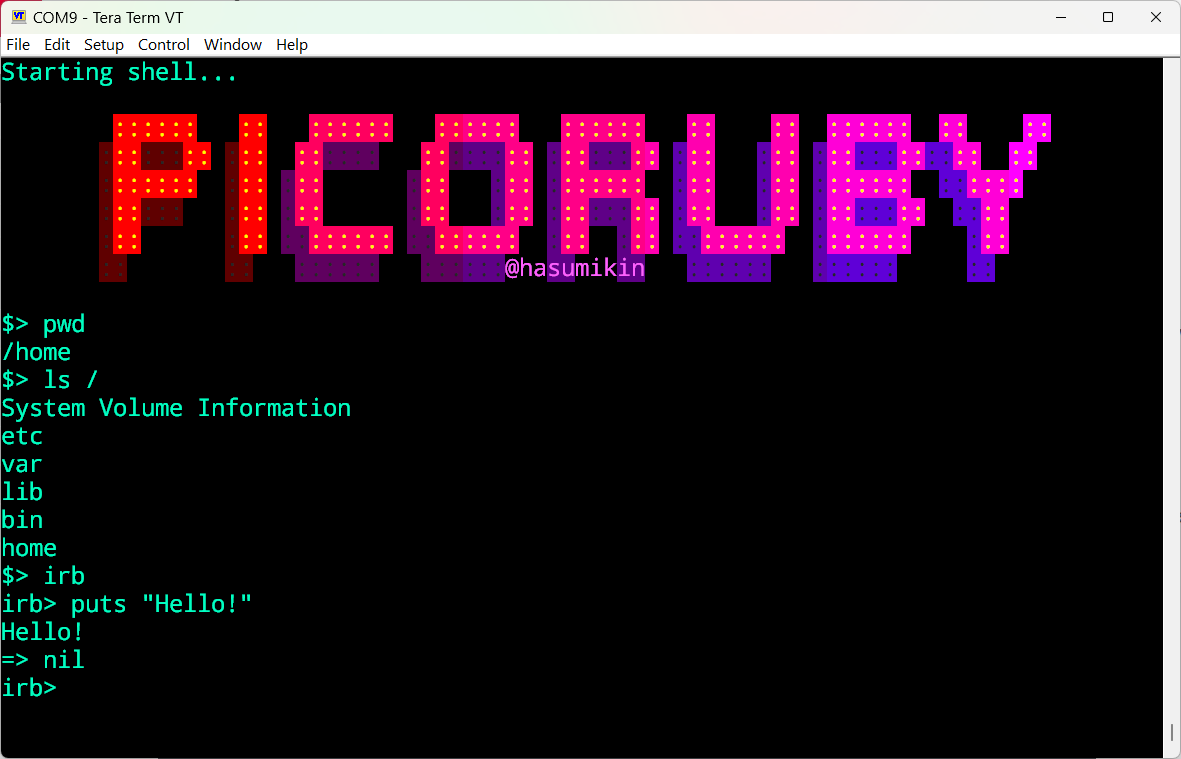
- R2P2 shell is a Unix-like shell, so you can use commands like
ls,cd,cat,rm, etc. irbcommand starts an interactive Ruby shell
- R2P2 shell is a Unix-like shell, so you can use commands like
Congratulations! Now you at the gate!
Before starting to dig into R2P2, we would like you to stargaze at the picoruby/picoruby repo🌟